Apache Iceberg Lakehouse
This guide will get you up and running with Apache Iceberg™ using StarRocks™, including sample code to highlight some powerful features.
Docker-Compose
The fastest way to get started is to use a docker-compose file that uses the starrocks/fe-ubuntu and starrocks/be-ubuntu
images which contain a local StarRocks cluster with a configured Iceberg catalog. To use this, you'll need to install
the Docker CLI.
Once you have Docker installed, save the yaml below into a file named docker-compose.yml:
services:

  starrocks-fe:
    image: starrocks/fe-ubuntu:4.0-latest
    hostname: starrocks-fe
    container_name: starrocks-fe
    user: root
    command: |
      bash /opt/starrocks/fe/bin/start_fe.sh --host_type FQDN
    ports:
      - 8030:8030
      - 9020:9020
      - 9030:9030
    networks:
      iceberg_net:
    environment:
      - AWS_ACCESS_KEY_ID=admin
      - AWS_SECRET_ACCESS_KEY=password
      - AWS_REGION=us-east-1
    healthcheck:
      test: 'mysql -u root -h starrocks-fe -P 9030 -e "SHOW FRONTENDS\G" |grep "Alive: true"'
      interval: 10s
      timeout: 5s
      retries: 3

  starrocks-be:
    image: starrocks/be-ubuntu:4.0-latest
    command:
      - /bin/bash
      - -c
      - |
        ulimit -n 65535;
        echo "# Enable data cache"  >> /opt/starrocks/be/conf/be.conf
        echo "block_cache_enable = true"  >> /opt/starrocks/be/conf/be.conf
        echo "block_cache_mem_size = 536870912" >> /opt/starrocks/be/conf/be.conf
        echo "block_cache_disk_size = 1073741824" >> /opt/starrocks/be/conf/be.conf
        sleep 15s
        mysql --connect-timeout 2 -h starrocks-fe -P 9030 -u root -e "ALTER SYSTEM ADD BACKEND \"starrocks-be:9050\";"
        bash /opt/starrocks/be/bin/start_be.sh
    ports:
      - 8040:8040
    hostname: starrocks-be
    container_name: starrocks-be
    user: root
    depends_on:
      starrocks-fe:
        condition: service_healthy
    healthcheck:
      test: 'mysql -u root -h starrocks-fe -P 9030 -e "SHOW BACKENDS\G" |grep "Alive: true"'
      interval: 10s
      timeout: 5s
      retries: 3
    networks:
      iceberg_net:
    environment:
      - HOST_TYPE=FQDN

  rest:
    image: apache/iceberg-rest-fixture
    container_name: iceberg-rest
    networks:
      iceberg_net:
        aliases:
          - iceberg-rest.minio
    ports:
      - 8181:8181
    environment:
      - AWS_ACCESS_KEY_ID=admin
      - AWS_SECRET_ACCESS_KEY=password
      - AWS_REGION=us-east-1
      - CATALOG_WAREHOUSE=s3://warehouse/
      - CATALOG_IO__IMPL=org.apache.iceberg.aws.s3.S3FileIO
      - CATALOG_S3_ENDPOINT=http://minio:9000

  minio:
    image: minio/minio:RELEASE.2024-10-29T16-01-48Z
    container_name: minio
    environment:
      - MINIO_ROOT_USER=admin
      - MINIO_ROOT_PASSWORD=password
      - MINIO_DOMAIN=minio
    networks:
      iceberg_net:
        aliases:
          - warehouse.minio
    ports:
      - 9001:9001
      - 9000:9000
    command: ["server", "/data", "--console-address", ":9001"]
  mc:
    depends_on:
      - minio
    image: minio/mc:RELEASE.2024-10-29T15-34-59Z
    container_name: mc
    networks:
      iceberg_net:
    environment:
      - AWS_ACCESS_KEY_ID=admin
      - AWS_SECRET_ACCESS_KEY=password
      - AWS_REGION=us-east-1
    entrypoint: >
      /bin/sh -c "
      until (/usr/bin/mc config host add minio http://minio:9000 admin password) do echo '...waiting...' && sleep 1; done;
      /usr/bin/mc rm -r --force minio/warehouse;
      /usr/bin/mc mb minio/warehouse;
      /usr/bin/mc policy set public minio/warehouse;
      tail -f /dev/null
      "
networks:
  iceberg_net:
Next, start up the docker containers with this command:
docker compose up --detach --wait --wait-timeout 400
You can then run any of the following commands to start a StarRocks session.
docker exec -it starrocks-fe \
mysql -P 9030 -h 127.0.0.1 -u root --prompt="StarRocks > "
Adding and Using a Catalog
CREATE EXTERNAL CATALOG 'demo'
COMMENT "External catalog to Apache Iceberg on MinIO"
PROPERTIES
(
  "type"="iceberg",
  "iceberg.catalog.type"="rest",
  "iceberg.catalog.uri"="http://iceberg-rest:8181",
  "iceberg.catalog.warehouse"="warehouse",
  "aws.s3.access_key"="admin",
  "aws.s3.secret_key"="password",
  "aws.s3.endpoint"="http://minio:9000",
  "aws.s3.enable_path_style_access"="true"
);
SHOW CATALOGS\G
*************************** 1. row ***************************
Catalog: default_catalog
   Type: Internal
Comment: An internal catalog contains this cluster's self-managed tables.
*************************** 2. row ***************************
Catalog: demo
   Type: Iceberg
Comment: External catalog to Apache Iceberg on MinIO
2 rows in set (0.00 sec)
SET CATALOG demo;
Creating and using a database
CREATE DATABASE nyc;
USE nyc;
Creating a table
CREATE TABLE demo.nyc.taxis
(
    trip_id            bigint,
    trip_distance      float,
    fare_amount double,
    store_and_fwd_flag string,
    vendor_id          bigint
) PARTITION BY (vendor_id);
Writing Data to a Table
INSERT INTO demo.nyc.taxis
VALUES (1000371, 1.8, 15.32, 'N', 1),
       (1000372, 2.5, 22.15, 'N', 2),
       (1000373, 0.9, 9.01, 'N', 2),
       (1000374, 8.4, 42.13, 'Y', 1);
Reading Data from a Table
SELECT *
FROM demo.nyc.taxis;
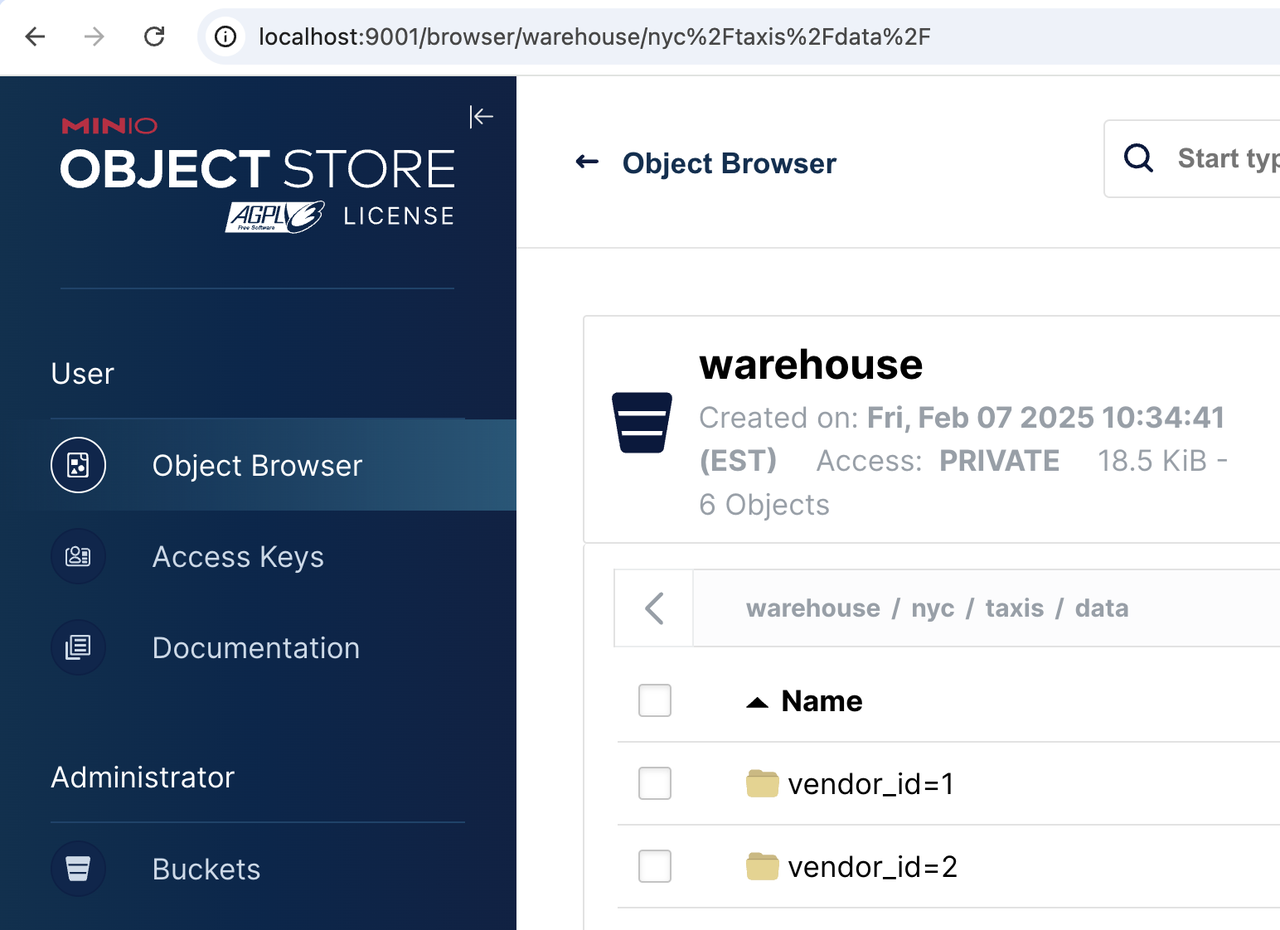
Verify that the data is stored in object storage
When you added and used the external catalog, Starrocks started using MinIO as the object store for the demo.nyc.taxis
table. If you navigate to http://localhost:9001 and then navigate through the Object Browser menu to
warehouse/nyc/taxis/ you can confirm that StarRocks is using MinIO for the storage.
The username and password for MinIO are in the docker-compose.yml file. You will be prompted to change the password to something better, just ignore this advice for the tutorial.
Next Steps
Adding Iceberg to StarRocks
If you already have a StarRocks 3.2.0, or later, environment, it comes with the Iceberg 1.6.0 included. No additional downloads or jars are needed.
Learn More
Now that you're up and running with Iceberg and StarRocks, check out the StarRocks-Iceberg docs to learn more!
